There’s nothing quite like the satisfaction of pulling a perfectly golden, crispy chicken dish from the oven, especially when it’s infused with the tangy, herbaceous flavors of ranch seasoning. As someone who’s tested countless chicken recipes in my home kitchen, I can confidently say that this Baked Ranch Chicken has earned its place as a staple in my weekly meal rotation. It combines simplicity with incredible flavor, and I’m excited to share all my tips and tricks for making this dish absolutely foolproof.
Why You’ll Love This Recipe
When I first started experimenting with ranch-flavored chicken, I was looking for something that would please my picky eaters while still delivering on flavor for the adults at the table. This recipe hits all those marks and more:
- It requires minimal prep work but delivers maximum flavor
- The chicken stays juicy on the inside while developing a crispy, flavorful coating
- Most ingredients are pantry staples you likely already have on hand
- It’s versatile enough to pair with countless side dishes
- Leftovers (if you have any!) reheat beautifully the next day
I’ve spent years perfecting this recipe, adjusting cooking times, temperatures, and ingredient ratios to create what I believe is the ultimate baked ranch chicken. The secret lies in a few key techniques that I’ll share throughout this article.
Ingredients You’ll Need
For this recipe, quality ingredients make all the difference. Here’s everything you’ll need to create this crowd-pleasing dish:
For the Chicken Base:
- 2 pounds chicken breasts (approximately 4 large breasts)
- 2 tablespoons olive oil
- 1 tablespoon Dijon mustard
- 1 tablespoon lemon juice, freshly squeezed
For the Ranch Coating:
- 1 cup panko breadcrumbs
- 1/3 cup grated Parmesan cheese
- 1 packet ranch seasoning mix (1 ounce)
- 1 teaspoon garlic powder
- 1 teaspoon onion powder
- 1/2 teaspoon paprika (sweet or smoked)
- 1/2 teaspoon black pepper
- 1/4 teaspoon cayenne pepper (optional, for heat)
- 2 tablespoons fresh parsley, finely chopped
Equipment:
- Baking sheet
- Parchment paper or aluminum foil
- Meat thermometer
- Shallow dishes for dredging
- Cooking spray
Ingredient Notes and Substitutions
Over the years, I’ve experimented with numerous variations of this recipe. Here are some insights on the ingredients:
Chicken Options
While I typically use boneless, skinless chicken breasts for this recipe, you can easily substitute with:
- Chicken thighs: These will be even juicier but will need a slightly longer cooking time
- Chicken tenders: Perfect for a quicker cooking time and kid-friendly portions
- Bone-in chicken pieces: Increase cooking time by about 15-20 minutes
Breadcrumbs
Panko breadcrumbs create the crispiest exterior, but you can substitute with:
- Regular breadcrumbs: The coating won’t be quite as crispy but will still taste delicious
- Gluten-free breadcrumbs: For those with gluten sensitivities
- Crushed cornflakes or rice cereal: For an extra crunchy coating
Ranch Seasoning
I typically use store-bought ranch seasoning packets for convenience, but I’ve included my homemade ranch seasoning blend below if you prefer to control the ingredients:
| Ingredient | Amount | Notes |
|---|---|---|
| Dried parsley | 2 tablespoons | Provides the classic ranch color and herbal notes |
| Dried dill | 1 tablespoon | Essential for authentic ranch flavor |
| Garlic powder | 1 tablespoon | Adds depth and savory notes |
| Onion powder | 1 tablespoon | Creates foundational flavor |
| Dried chives | 1 tablespoon | Adds fresh, mild onion flavor |
| Salt | 1 teaspoon | Enhances all other flavors |
| Black pepper | 1/2 teaspoon | Adds gentle heat and complexity |
| Dried buttermilk powder | 2 tablespoons | Creates the tangy ranch base (optional) |
Simply mix these ingredients together and use 2 tablespoons of the mixture in place of a store-bought packet.
Preparation: Step-by-Step
The key to this recipe’s success lies in the preparation. Follow these steps carefully for chicken that’s perfectly cooked and seasoned throughout.

Step 1: Prepare the Chicken
- Preheat your oven to 375°F (190°C) and line a baking sheet with parchment paper or aluminum foil. If using foil, lightly spray with cooking spray.
- If your chicken breasts are very thick, butterfly them or pound them to an even thickness of about 3/4 inch. This ensures even cooking.
- Pat the chicken breasts dry with paper towels. This is crucial for helping the coating adhere properly.
Step 2: Create the Moisture Layer
- In a shallow dish, whisk together the olive oil, Dijon mustard, and lemon juice until well combined.
- Season this mixture with a pinch of salt and pepper.
Step 3: Prepare the Ranch Coating
- In another shallow dish, combine the panko breadcrumbs, grated Parmesan, ranch seasoning, garlic powder, onion powder, paprika, black pepper, and cayenne (if using).
- Add the chopped fresh parsley and mix thoroughly.
Step 4: Dredge the Chicken
- Dip each chicken breast into the olive oil mixture, ensuring it’s completely coated on all sides.
- Immediately transfer to the breadcrumb mixture and press firmly to adhere the coating to all sides of the chicken.
- Place the coated chicken breasts on the prepared baking sheet, leaving space between each piece.
Step 5: Prepare for Baking
- Lightly spray the tops of the coated chicken with cooking spray. This helps achieve that golden-brown, crispy exterior.
- For extra flavor and color, you can sprinkle a little additional paprika and parsley on top.
Baking Instructions
The baking process is where many home cooks go wrong with this recipe. After numerous tests, I’ve determined the optimal cooking method:
- Place the baking sheet in the preheated oven, positioning it in the center rack.
- Bake for 20 minutes, then check the chicken’s internal temperature.
- Continue baking for an additional 5-10 minutes until the chicken reaches an internal temperature of 165°F (74°C) and the coating is golden brown and crispy.
- For extra crispiness, you can turn on the broiler for the final 1-2 minutes, watching carefully to prevent burning.
- Remove from the oven and let the chicken rest for 5 minutes before serving. This allows the juices to redistribute throughout the meat.
Cooking Time Table
I’ve found that cooking times can vary based on the thickness of your chicken and your specific oven. Use this table as a general guide:
| Chicken Cut | Approximate Weight | Cooking Time at 375°F |
|---|---|---|
| Regular chicken breasts | 6-8 oz each | 25-30 minutes |
| Thin-sliced chicken breasts | 4-5 oz each | 18-22 minutes |
| Chicken tenders | 2-3 oz each | 15-18 minutes |
| Chicken thighs (boneless) | 4-5 oz each | 25-30 minutes |
| Chicken thighs (bone-in) | 6-8 oz each | 35-40 minutes |
Remember, these times are approximate. Always use a meat thermometer to ensure your chicken has reached the safe internal temperature of 165°F (74°C).
My Secret Tips for Perfect Results
After making this recipe countless times, I’ve discovered several techniques that elevate this dish from good to exceptional:
- Temperature matters: Let the chicken sit at room temperature for 15 minutes before coating. Cold chicken straight from the refrigerator won’t cook as evenly.
- Don’t skip the drying step: Patting the chicken dry with paper towels ensures the coating adheres properly instead of sliding off during baking.
- The mustard trick: The small amount of Dijon mustard in the moisture layer adds incredible depth of flavor while helping the coating stick better.
- Panko + regular breadcrumbs: For the ultimate texture, I sometimes use a 75/25 mix of panko and regular breadcrumbs. The panko provides crunch while the regular breadcrumbs fill in the gaps.
- Let it rest: Allowing the chicken to rest for 5 minutes after baking helps lock in moisture and prevents the juices from running out when you cut into it.
- Fresh herbs make a difference: While dried herbs in the ranch seasoning provide the base flavor, adding fresh parsley to the coating brightens everything up.
- Don’t crowd the pan: Leave space between each piece of chicken to allow hot air to circulate, resulting in crispier chicken all around.
Serving Suggestions
This versatile chicken dish pairs beautifully with a wide variety of sides. Here are some of my favorite combinations:
For a Weeknight Family Dinner:
- Roasted garlic mashed potatoes
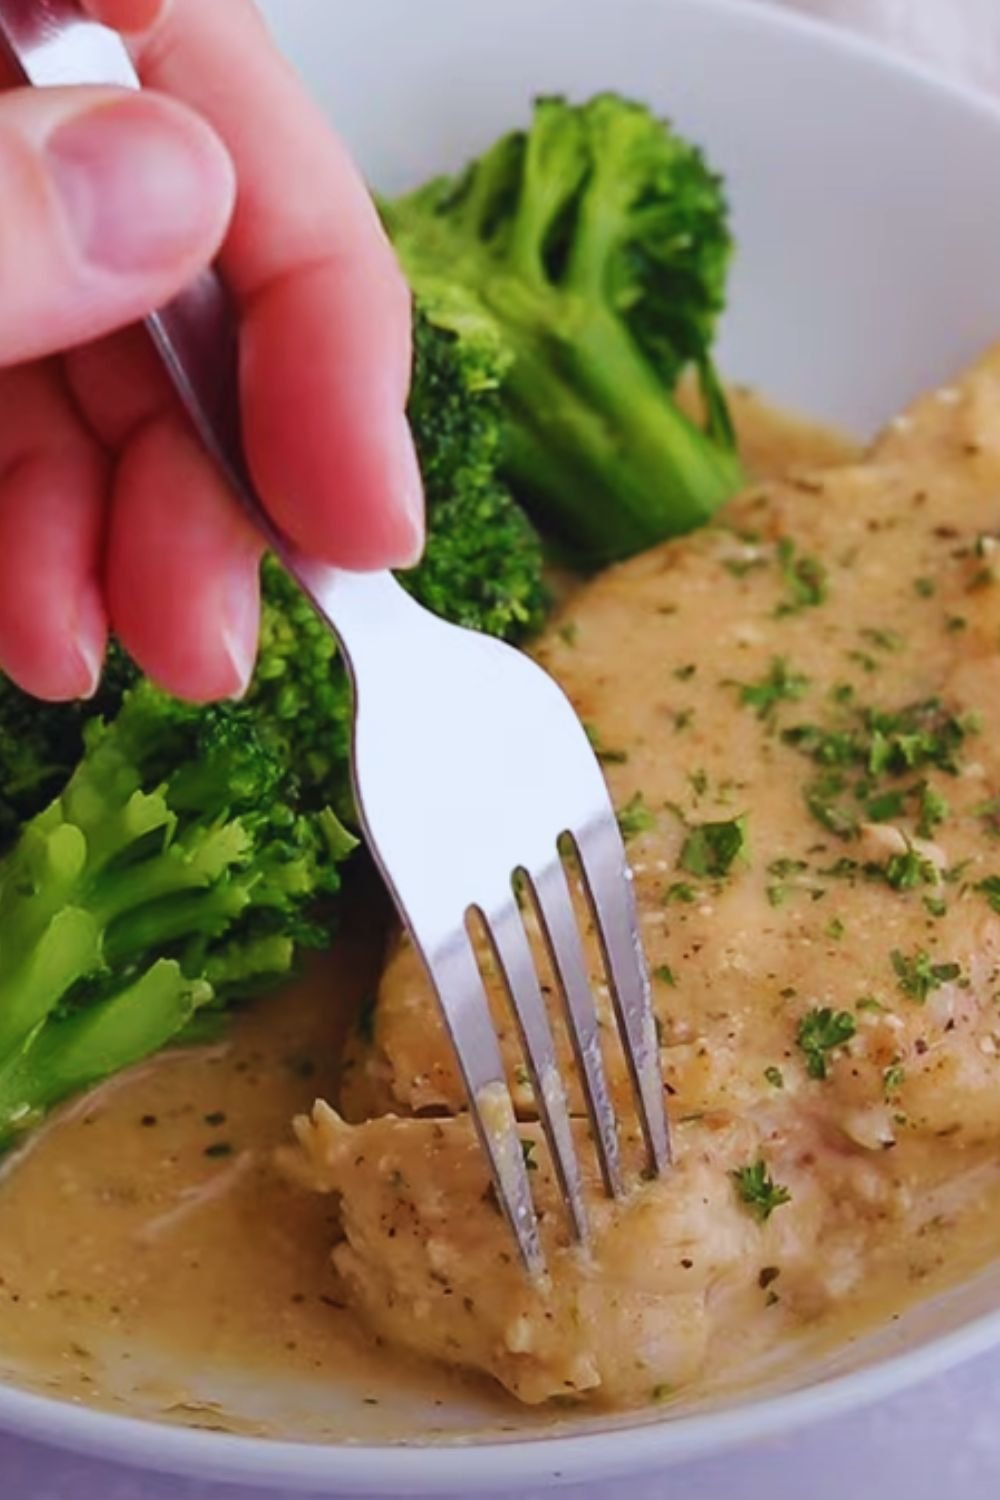
- Steamed broccoli with a squeeze of lemon
- Simple green salad with ranch dressing (to echo the flavors in the chicken)
For a Casual Gathering:
- Loaded baked potatoes
- Grilled corn on the cob
- Coleslaw with apple cider vinegar dressing
For a Lighter Meal:
- Cauliflower rice pilaf
- Roasted vegetables (zucchini, bell peppers, and cherry tomatoes work beautifully)
- Cucumber and tomato salad with Greek yogurt dressing
Sauce Pairings:
While this chicken is flavorful enough on its own, sometimes I like to offer dipping sauces on the side:
| Sauce | Base Ingredients | Flavor Profile |
|---|---|---|
| Honey Mustard | Mayo, honey, Dijon, vinegar | Sweet, tangy, creamy |
| Buffalo Ranch | Ranch dressing, hot sauce | Spicy, cooling, zesty |
| Garlic Aioli | Mayo, fresh garlic, lemon juice | Rich, pungent, bright |
| Avocado Cream | Avocado, sour cream, lime | Creamy, fresh, tangy |
Storage and Reheating
One of the best things about this recipe is how well it works for meal prep. Here’s how to properly store and reheat your baked ranch chicken:
Refrigerator Storage:
- Allow the chicken to cool completely before refrigerating.
- Store in an airtight container for up to 3 days.
- For best results, store the chicken separate from any sides to prevent sogginess.
Freezer Storage:
- Place cooled chicken pieces on a baking sheet in a single layer and freeze for 1-2 hours.
- Transfer to a freezer-safe container or zip-top bag and store for up to 2 months.
- Label with the date and contents.
Reheating Methods:
| Method | Instructions | Best For |
|---|---|---|
| Oven | 350°F for 15-20 minutes | Preserving crispiness |
| Air Fryer | 375°F for 5-7 minutes | Quick reheating with maximum crispiness |
| Microwave | 2 minutes on 70% power | Quick lunch (note: coating won’t stay crisp) |
| Toaster Oven | 350°F for 10 minutes | Small portions with good crispiness |
For the best results when reheating, I place the chicken on a wire rack over a baking sheet in the oven. This allows hot air to circulate all around the chicken, restoring much of the original crispiness.
Variations to Try
Over the years, I’ve experimented with numerous variations of this basic recipe. Here are some of my favorite twists:
Spicy Ranch Chicken
Add 1 teaspoon of cayenne pepper and 1 tablespoon of hot sauce to the moisture layer for a chicken dish with serious kick.
Parmesan Ranch Chicken
Double the Parmesan in the coating mixture and add 1/4 cup of finely grated Parmesan to the moisture layer as well.
Herb Garden Ranch Chicken
Add 1 tablespoon each of fresh chopped rosemary, thyme, and basil to the coating mixture for an herb-forward variation.
Lemon Pepper Ranch Chicken
Add 1 tablespoon of lemon zest and 1 teaspoon of coarsely ground black pepper to the coating mixture.
Nutritional Information
For those tracking their nutritional intake, here’s an approximate breakdown per serving (based on 4 servings):
| Nutrient | Amount per Serving |
|---|---|
| Calories | 385 kcal |
| Protein | 42g |
| Carbohydrates | 14g |
| Fat | 18g |
| Fiber | 1g |
| Sugar | 1g |
| Sodium | 720mg |
| Calcium | 152mg |
| Iron | 2mg |
Note: Values are approximate and may vary based on specific ingredients and brands used.
Why This Recipe Works
The science behind this recipe is what makes it so reliable. The combination of oil and Dijon creates a perfect adherent for the breadcrumb mixture, while the protein in the Parmesan cheese helps form a cohesive crust. The ranch seasoning contains buttermilk solids that not only add flavor but also help tenderize the chicken slightly.
The baking temperature of 375°F is carefully chosen to allow the chicken to cook through without burning the coating. It’s hot enough to create a nice crust but not so hot that the outside burns before the inside is done.
The resting period at the end is crucial because it allows the carry-over cooking to finish the process while letting the muscle fibers relax and retain more moisture. It’s these little details that make the difference between good chicken and great chicken.
Troubleshooting Common Issues
Despite how foolproof this recipe is, I’ve encountered a few challenges over the years. Here are solutions to common problems:
Coating Falls Off During Baking
- Make sure you’ve thoroughly dried the chicken breasts before coating
- Press the breadcrumb mixture firmly onto the chicken
- Don’t move the chicken around too much on the baking sheet
- Make sure your oven is fully preheated before adding the chicken
Chicken Turns Out Dry
- Check your chicken a few minutes earlier with a meat thermometer
- Consider brining your chicken breasts for 30 minutes before cooking
- Make sure you’re letting the chicken rest after cooking
- Try using chicken thighs instead, which are naturally more forgiving
Coating Doesn’t Brown Properly
- Lightly spray the coating with cooking spray before baking
- Turn on the broiler for the last 1-2 minutes of cooking
- Make sure you’re not using a dark-colored baking sheet, which can affect browning
- Check that your oven temperature is accurate with an oven thermometer
Frequently Asked Questions
Q: Can I make this recipe ahead of time? A: Yes, you can prepare the chicken up through the coating step, then refrigerate for up to 4 hours before baking. You may need to add a few extra minutes to the baking time if cooking from cold.
Q: How do I know when the chicken is done? A: The most reliable method is using a meat thermometer inserted into the thickest part of the breast. It should read 165°F (74°C). If you don’t have a thermometer, cut into the thickest part – the meat should be opaque and white throughout with no pink.
Q: Can I use homemade ranch dressing instead of dry seasoning? A: Liquid ranch dressing won’t work well in the coating as it will make the breadcrumbs soggy. Stick with the dry seasoning mix for best results.
Q: Is there a way to make this dairy-free? A: Yes, you can skip the Parmesan cheese and use nutritional yeast instead for a similar savory flavor. Also, check that your ranch seasoning doesn’t contain buttermilk powder, or make your own without it.
Q: What if I don’t have Dijon mustard? A: Yellow mustard or whole grain mustard can work as substitutes. In a pinch, you can use mayonnaise with a splash of vinegar to create that tangy binding layer.
Q: Can I cook this in an air fryer? A: Absolutely! Cook at 375°F for about 12-15 minutes, flipping halfway through. The air fryer creates an extra crispy exterior that’s absolutely delicious.
Q: Why do you add lemon juice to the moisture layer? A: The acid in the lemon juice helps tenderize the chicken slightly while adding brightness to the flavor profile. It also helps cut through the richness of the coating.
Final Thoughts
This Baked Ranch Chicken recipe has become a cornerstone in my cooking repertoire for good reason. It strikes that perfect balance between ease of preparation and impressive results. The crispy, flavorful coating and juicy interior make it a hit with everyone from picky children to discerning dinner guests.
What I love most about this recipe is its flexibility. Once you master the basic technique, you can adapt it with different seasonings and complementary ingredients to suit your taste preferences or what you have available in your pantry.
Remember that the key to success lies in the details: properly drying the chicken, creating that crucial moisture layer, and monitoring the cooking temperature carefully. Follow these steps, and you’ll end up with a restaurant-quality dish that looks and tastes like you spent hours in the kitchen, when in reality, it requires minimal hands-on time.
I hope this recipe brings as much joy to your table as it has to mine. There’s something deeply satisfying about serving a homemade meal that garners enthusiastic praise, yet doesn’t leave you exhausted from complicated cooking techniques or hard-to-find ingredients. This Baked Ranch Chicken hits that sweet spot perfectly.
Happy cooking!