Have you ever found yourself staring at a whole turkey, wondering how on earth you’re going to cook it evenly without drying out the breast meat? I certainly have. After years of experimenting with different turkey cooking methods, I’ve become a passionate advocate for spatchcocking. This technique has revolutionized my holiday cooking, and I’m excited to share everything I’ve learned with you.
What is Spatchcocking?
Spatchcocking (also called butterflying) is a preparation technique where you remove the backbone of the bird and flatten it out before cooking. The word “spatchcock” is believed to be shorthand for “dispatch the cock,” referring to a quick way of splitting and cooking poultry. This centuries-old method has recently gained popularity among home cooks for very good reasons.
Why should you spatchcock your turkey?
- Cooks in about half the time of a traditional whole turkey
- Results in evenly cooked meat (no more dry breast meat!)
- Creates maximum crispy skin exposure
- Allows for more even seasoning
- Makes carving significantly easier
When I first tried this method five years ago, I was skeptical. Could removing the backbone really make that much difference? The answer was a resounding yes. I’ve never gone back to cooking a whole, unsplit turkey since.
Tools You’ll Need
Before diving into the process, gathering the right tools is essential. Here’s what I recommend having on hand:
- Sharp kitchen shears – The star of the show, these need to be strong enough to cut through bone
- Large cutting board – Preferably with a groove around the edge to catch juices
- Sharp chef’s knife – For trimming and potential cartilage cutting
- Kitchen towels – For better grip and cleanup
- Large baking sheet or roasting pan – With a rack for the turkey to sit on
- Instant-read meat thermometer – Essential for perfectly cooked turkey
Having the right kitchen shears is absolutely critical. I learned this the hard way when I attempted to spatchcock my first turkey with regular household scissors. Twenty minutes of hand cramping later, I invested in proper poultry shears and haven’t looked back.
Step-by-Step Spatchcocking Process
Step 1: Prepare Your Work Area
I always start by creating a clean, spacious work area. Spatchcocking can be a bit messy, so I lay out several kitchen towels and make sure I have a large cutting board with plenty of surrounding counter space. I also keep a bowl nearby for the backbone and giblets that I’ll remove.
Step 2: Position the Turkey
Place your turkey breast-side down on the cutting board with the legs pointing toward you. I find this orientation gives the best leverage for cutting. Remove any giblets or neck pieces that may be stored inside the cavity. Pat the turkey dry with paper towels to ensure you have a good grip.
Step 3: Cut Along the Backbone
This is where those strong kitchen shears become your best friend. Starting at the tail end of the turkey:
- Identify the backbone running down the center of the bird
- Position your kitchen shears on one side of the backbone, near the tail
- Cut all the way up that side of the backbone to the neck
- Repeat on the other side of the backbone
- Remove the backbone completely (save it for making stock!)
The first time I did this, I was surprised by how much force was needed. Don’t be alarmed – poultry bones are strong, especially near the thigh joints. Take your time and reposition your hands as needed for better leverage.
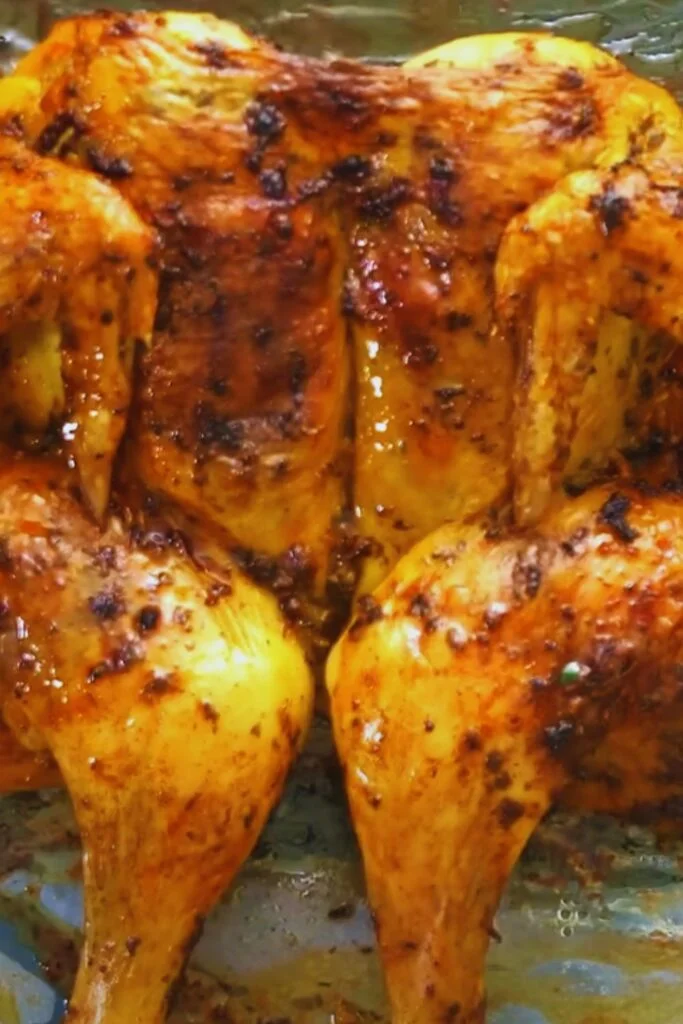
Step 4: Flatten the Turkey
Now for the satisfying part:
- Flip the turkey over so it’s breast-side up
- Place your hands on the breastbone in the center of the turkey
- Press down firmly until you hear a crack and the turkey flattens out
- Arrange the legs and wings so they’re symmetrically positioned
The sound of the breastbone cracking can be startling, but it’s exactly what you want to hear! This step ensures the turkey will lie completely flat, which is crucial for even cooking.
Step 5: Final Trimming (Optional)
For an extra-neat presentation, I sometimes trim the wing tips, which can burn during cooking. You can also tuck the wing joints behind the breast to keep them from cooking too quickly.
Preparing Your Spatchcocked Turkey for Cooking
Now that your turkey is beautifully flattened, it’s time to prepare it for the oven.
Dry Brining (Recommended)
I’m a firm believer in dry brining for the juiciest results:
- Mix 1/2 cup kosher salt, 2 tablespoons baking powder (helps with crispy skin!), and your favorite dried herbs
- Sprinkle the mixture generously all over the turkey, focusing on the breast and thigh meat
- Refrigerate uncovered for 12-24 hours on a rack set over a baking sheet
The dry brine draws moisture to the surface, which is then reabsorbed into the meat along with the seasonings, resulting in deeply flavored, juicy meat.
Compound Butter Application
For extra flavor and moisture, I like to make a compound butter:
| Ingredient | Amount | Purpose |
|---|---|---|
| Unsalted butter | 1 cup (2 sticks) | Base that melts into meat |
| Fresh herbs (sage, thyme, rosemary) | 1/4 cup, finely chopped | Aromatic flavor |
| Garlic | 4-6 cloves, minced | Savory depth |
| Lemon zest | From 1 lemon | Brightness |
| Black pepper | 1 tablespoon | Warmth and spice |
| Kosher salt | 1 tablespoon (omit if dry-brining) | Flavor enhancement |
Gently lift the skin away from the breast and thigh meat and spread the compound butter directly onto the meat under the skin. This creates a self-basting effect as the butter melts during cooking.
Cooking Your Spatchcocked Turkey
One of the greatest benefits of spatchcocking is the reduced cooking time. Here’s how I approach it:
Oven Temperature and Timing
For a standard roast:
| Turkey Weight | Oven Temperature | Approximate Cooking Time | Target Internal Temperature |
|---|---|---|---|
| 10-12 pounds | 450°F for 30 mins, then 350°F | 70-90 minutes total | 165°F (thigh), 160°F (breast) |
| 13-16 pounds | 450°F for 30 mins, then 350°F | 90-110 minutes total | 165°F (thigh), 160°F (breast) |
| 17-20 pounds | 450°F for 30 mins, then 350°F | 110-130 minutes total | 165°F (thigh), 160°F (breast) |
| 21-24 pounds | 450°F for 30 mins, then 350°F | 130-150 minutes total | 165°F (thigh), 160°F (breast) |
I start with high heat to get the skin browning, then reduce to finish cooking. This approach gives you that beautifully crispy exterior while maintaining juicy meat.
Roasting Setup
- Position an oven rack in the lower-middle position
- Place the turkey on a wire rack set inside a rimmed baking sheet or roasting pan
- For extra flavor, scatter roughly chopped onions, carrots, and celery in the pan under the turkey
The elevated position on the rack ensures air can circulate freely around the entire turkey, resulting in more even cooking and beautifully crisp skin all over.
Basting: Yes or No?
This might be controversial, but I rarely baste my spatchcocked turkey. Here’s why:
- Opening the oven repeatedly lowers the temperature and extends cooking time
- The flattened shape already promotes even cooking
- If you’ve used compound butter under the skin, the turkey essentially self-bastes
If you do choose to baste, keep it minimal – perhaps once or twice during cooking.
Using a Meat Thermometer
The absolute key to perfect doneness is using a reliable meat thermometer. Check the temperature in multiple spots:
- The thickest part of the thigh (aim for 165°F)
- The thickest part of the breast (aim for 160°F – it will rise to 165°F while resting)
I can’t stress enough how important this step is. Even with all the timing guidelines in the world, every oven is different, and every turkey has its quirks.
Resting and Carving
The Critical Resting Period
Once your turkey reaches the target temperature, resist the urge to carve immediately! Resting is essential:
- Remove the turkey from the oven
- Tent loosely with aluminum foil
- Let rest for at least 20-30 minutes (longer for larger birds)
During this time, the juices redistribute throughout the meat. Skip this step, and you’ll lose all those precious juices to your cutting board instead of your mouth.
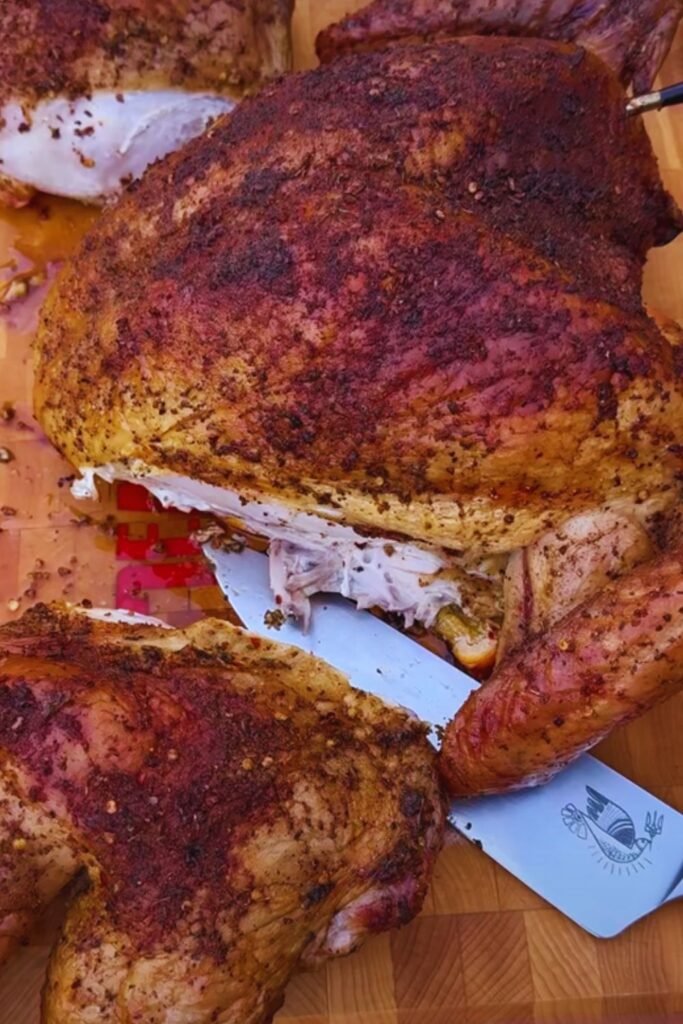
Carving a Spatchcocked Turkey
Here’s where you really reap the benefits of spatchcocking – carving becomes significantly easier:
- Remove the legs/thighs by cutting through the joint where they meet the body
- Separate thighs from drumsticks at the joint
- Remove the wings at their joint connection
- Slice the breast meat parallel to the breastbone in even slices
The flat presentation makes it much easier to see exactly where to cut, resulting in beautiful, presentation-worthy slices.
Flavor Variations and Seasoning Ideas
While a classic herb-butter approach never disappoints, I love experimenting with different flavor profiles:
Mediterranean Inspiration
| Ingredient | Amount | Application |
|---|---|---|
| Lemon | 2, zested and quartered | Zest in compound butter, quarters in cavity |
| Oregano | 2 tablespoons, fresh | Mixed with butter and under skin |
| Garlic | 8 cloves, minced | Under skin and scattered in roasting pan |
| Olive oil | 1/4 cup | Brushed over skin |
| Red pepper flakes | 1 teaspoon | Mixed into compound butter |
Smoky Southwest
| Ingredient | Amount | Application |
|---|---|---|
| Smoked paprika | 3 tablespoons | Rubbed on and under skin |
| Cumin | 1 tablespoon | Mixed with butter |
| Chipotle powder | 2 teaspoons | Mixed with butter |
| Lime | 2, zested and juiced | Zest in butter, juice brushed on during last 30 mins |
| Cilantro | 1/4 cup, chopped | Mixed into compound butter |
Herb Garden Abundance
| Ingredient | Amount | Application |
|---|---|---|
| Fresh sage | 1/4 cup, chopped | Under skin and in cavity |
| Fresh thyme | 1/4 cup, leaves only | Under skin and in cavity |
| Fresh rosemary | 3 tablespoons, chopped | Under skin and in cavity |
| Fresh parsley | 1/4 cup, chopped | Under skin and scattered in roasting pan |
| Shallots | 4, minced | Mixed into compound butter |
Serving Suggestions
A beautifully spatchcocked turkey deserves equally thoughtful accompaniments. Here are some of my favorite pairings:
Classic Sides with a Twist
- Roasted garlic mashed potatoes with brown butter
- Sourdough stuffing with dried cranberries and toasted pecans
- Green beans with caramelized shallots and mushrooms
- Sweet potato casserole with maple-pecan topping (no marshmallows!)
- Fresh cranberry sauce with orange zest and a hint of ginger
Make-Ahead Options
When hosting, I’m all about make-ahead dishes to complement the turkey:
- Roasted root vegetables that can be reheated
- Grain salads that taste great at room temperature
- Cranberry sauce (always better the next day anyway)
- Dinner rolls that need just a quick warm-up
Non-Alcoholic Pairings
For beverages that complement the rich flavors of turkey:
- Sparkling apple cider
- Pomegranate spritzer with fresh rosemary
- Cranberry-orange punch
- Hot spiced cider with cinnamon sticks
Troubleshooting Common Issues
Even with the best preparation, challenges can arise. Here’s how I handle them:
Turkey Cooking Unevenly
Problem: Some parts cooking faster than others.
Solution: Use small pieces of aluminum foil to shield areas that are browning too quickly. This targeted approach protects faster-cooking sections while allowing slower parts to catch up.
Skin Not Crisping Properly
Problem: Skin remains pale or rubbery.
Solution:
- Make sure your turkey is thoroughly dried before roasting
- Don’t tent with foil during cooking
- Try brushing with a mixture of melted butter and honey in the last 15 minutes
- Consider a quick blast under the broiler (watching carefully!)
Turkey Done Too Soon
Problem: Turkey reaches temperature before guests arrive.
Solution:
- Remove from oven
- Cover loosely with foil and a kitchen towel on top
- It will stay warm for about 1.5 hours without significant quality loss
Using Leftovers Creatively
One of my favorite parts of cooking a turkey is the leftovers! Here are some creative ways I use them:
Beyond the Sandwich
While a good turkey sandwich is a classic, try these alternatives:
- Turkey pot pie with a puff pastry crust
- Turkey enchiladas with verde sauce
- Creamy turkey and wild rice soup
- Turkish-inspired börek with leftover turkey and greens
- Crispy turkey croquettes with herbs and parmesan
Stock from the Backbone
Remember that backbone you removed? It makes incredible stock:
- Roast the backbone and neck until well-browned
- Simmer with aromatic vegetables for 2-3 hours
- Strain and use for soups, gravy, or risotto
- Freeze in ice cube trays for convenient small portions
Q&A Section
Q: Can I spatchcock a frozen turkey?
A: No, your turkey must be completely thawed before spatchcocking. The process requires cutting through bones, which is impossible with a frozen bird. Plan ahead and allow adequate time for thawing in the refrigerator (about 24 hours for every 4-5 pounds).
Q: Is spatchcocking safe for stuffing the turkey?
A: I don’t recommend stuffing a spatchcocked turkey. The whole advantage of this method is the even, quick cooking, which would be compromised by adding stuffing. Instead, bake your stuffing separately in a casserole dish and, if desired, baste it with some of the turkey drippings for flavor.
Q: My kitchen shears aren’t cutting through the bones easily. What should I do?
A: If you’re struggling with tough bones, especially near the thigh joints, switch to a sharp chef’s knife for those sections. Place the knife precisely and use controlled pressure. Alternatively, invest in heavy-duty poultry shears specifically designed for this task – they’re worth every penny if you plan to spatchcock regularly.
Q: Can I spatchcock the turkey a day ahead?
A: Absolutely! In fact, I prefer to spatchcock the day before cooking. This gives me time to dry brine the turkey overnight, which improves flavor and texture tremendously. Just make sure to keep the spatchcocked turkey refrigerated on a rack over a baking sheet to catch any drips.
Q: How much time does spatchcocking really save?
A: Spatchcocking cuts cooking time by roughly 30-50%, depending on the size of your turkey. A 12-pound turkey that might take 3-4 hours traditionally will be done in about 90 minutes when spatchcocked. Beyond time savings, the more even cooking is the real advantage.
Q: Can this technique be used for other poultry?
A: Definitely! I use the spatchcocking technique for chickens, ducks, and game birds. The principles remain the same, though smaller birds require less cooking time. A spatchcocked chicken cooks in about 45 minutes at 425°F and comes out wonderfully juicy with crisp skin.
Final Thoughts
Spatchcocking has transformed my relationship with turkey. What used to be a stressful, day-long affair with uncertain results has become a reliable, efficient process that consistently yields delicious results. The technique might seem intimidating at first glance, but once you try it, you’ll wonder why you ever cooked turkey any other way.
I encourage you to give this method a try, even if you start with a smaller bird like a chicken to build your confidence. The principles are the same, and the rewards – juicy meat, crispy skin, and dramatically reduced cooking time – are well worth the initial learning curve.
Remember that cooking should be enjoyable, not stressful. Spatchcocking removes much of the guesswork from turkey preparation, allowing you to focus on what really matters: creating delicious food and wonderful memories with the people around your table.